# Installation with Craftsman
**URL:** https://community.garadget.com/t/installation-with-craftsman/575
**Category:** Wiring Openers
**Tags:** craftsman, opener, wiring
**Created:** [October 25, 2016, 6:27am UTC](https://community.garadget.com/t/installation-with-craftsman/575 "2016-10-25T06:27:22Z")
**Posts on this page:** 16
**Page:** 1
### Author:  [@nite](https://community.garadget.com/u/nite)
#### Post date: [October 25, 2016, 6:27am UTC](https://community.garadget.com/t/installation-with-craftsman/575/1 "2016-10-25T06:27:22Z")
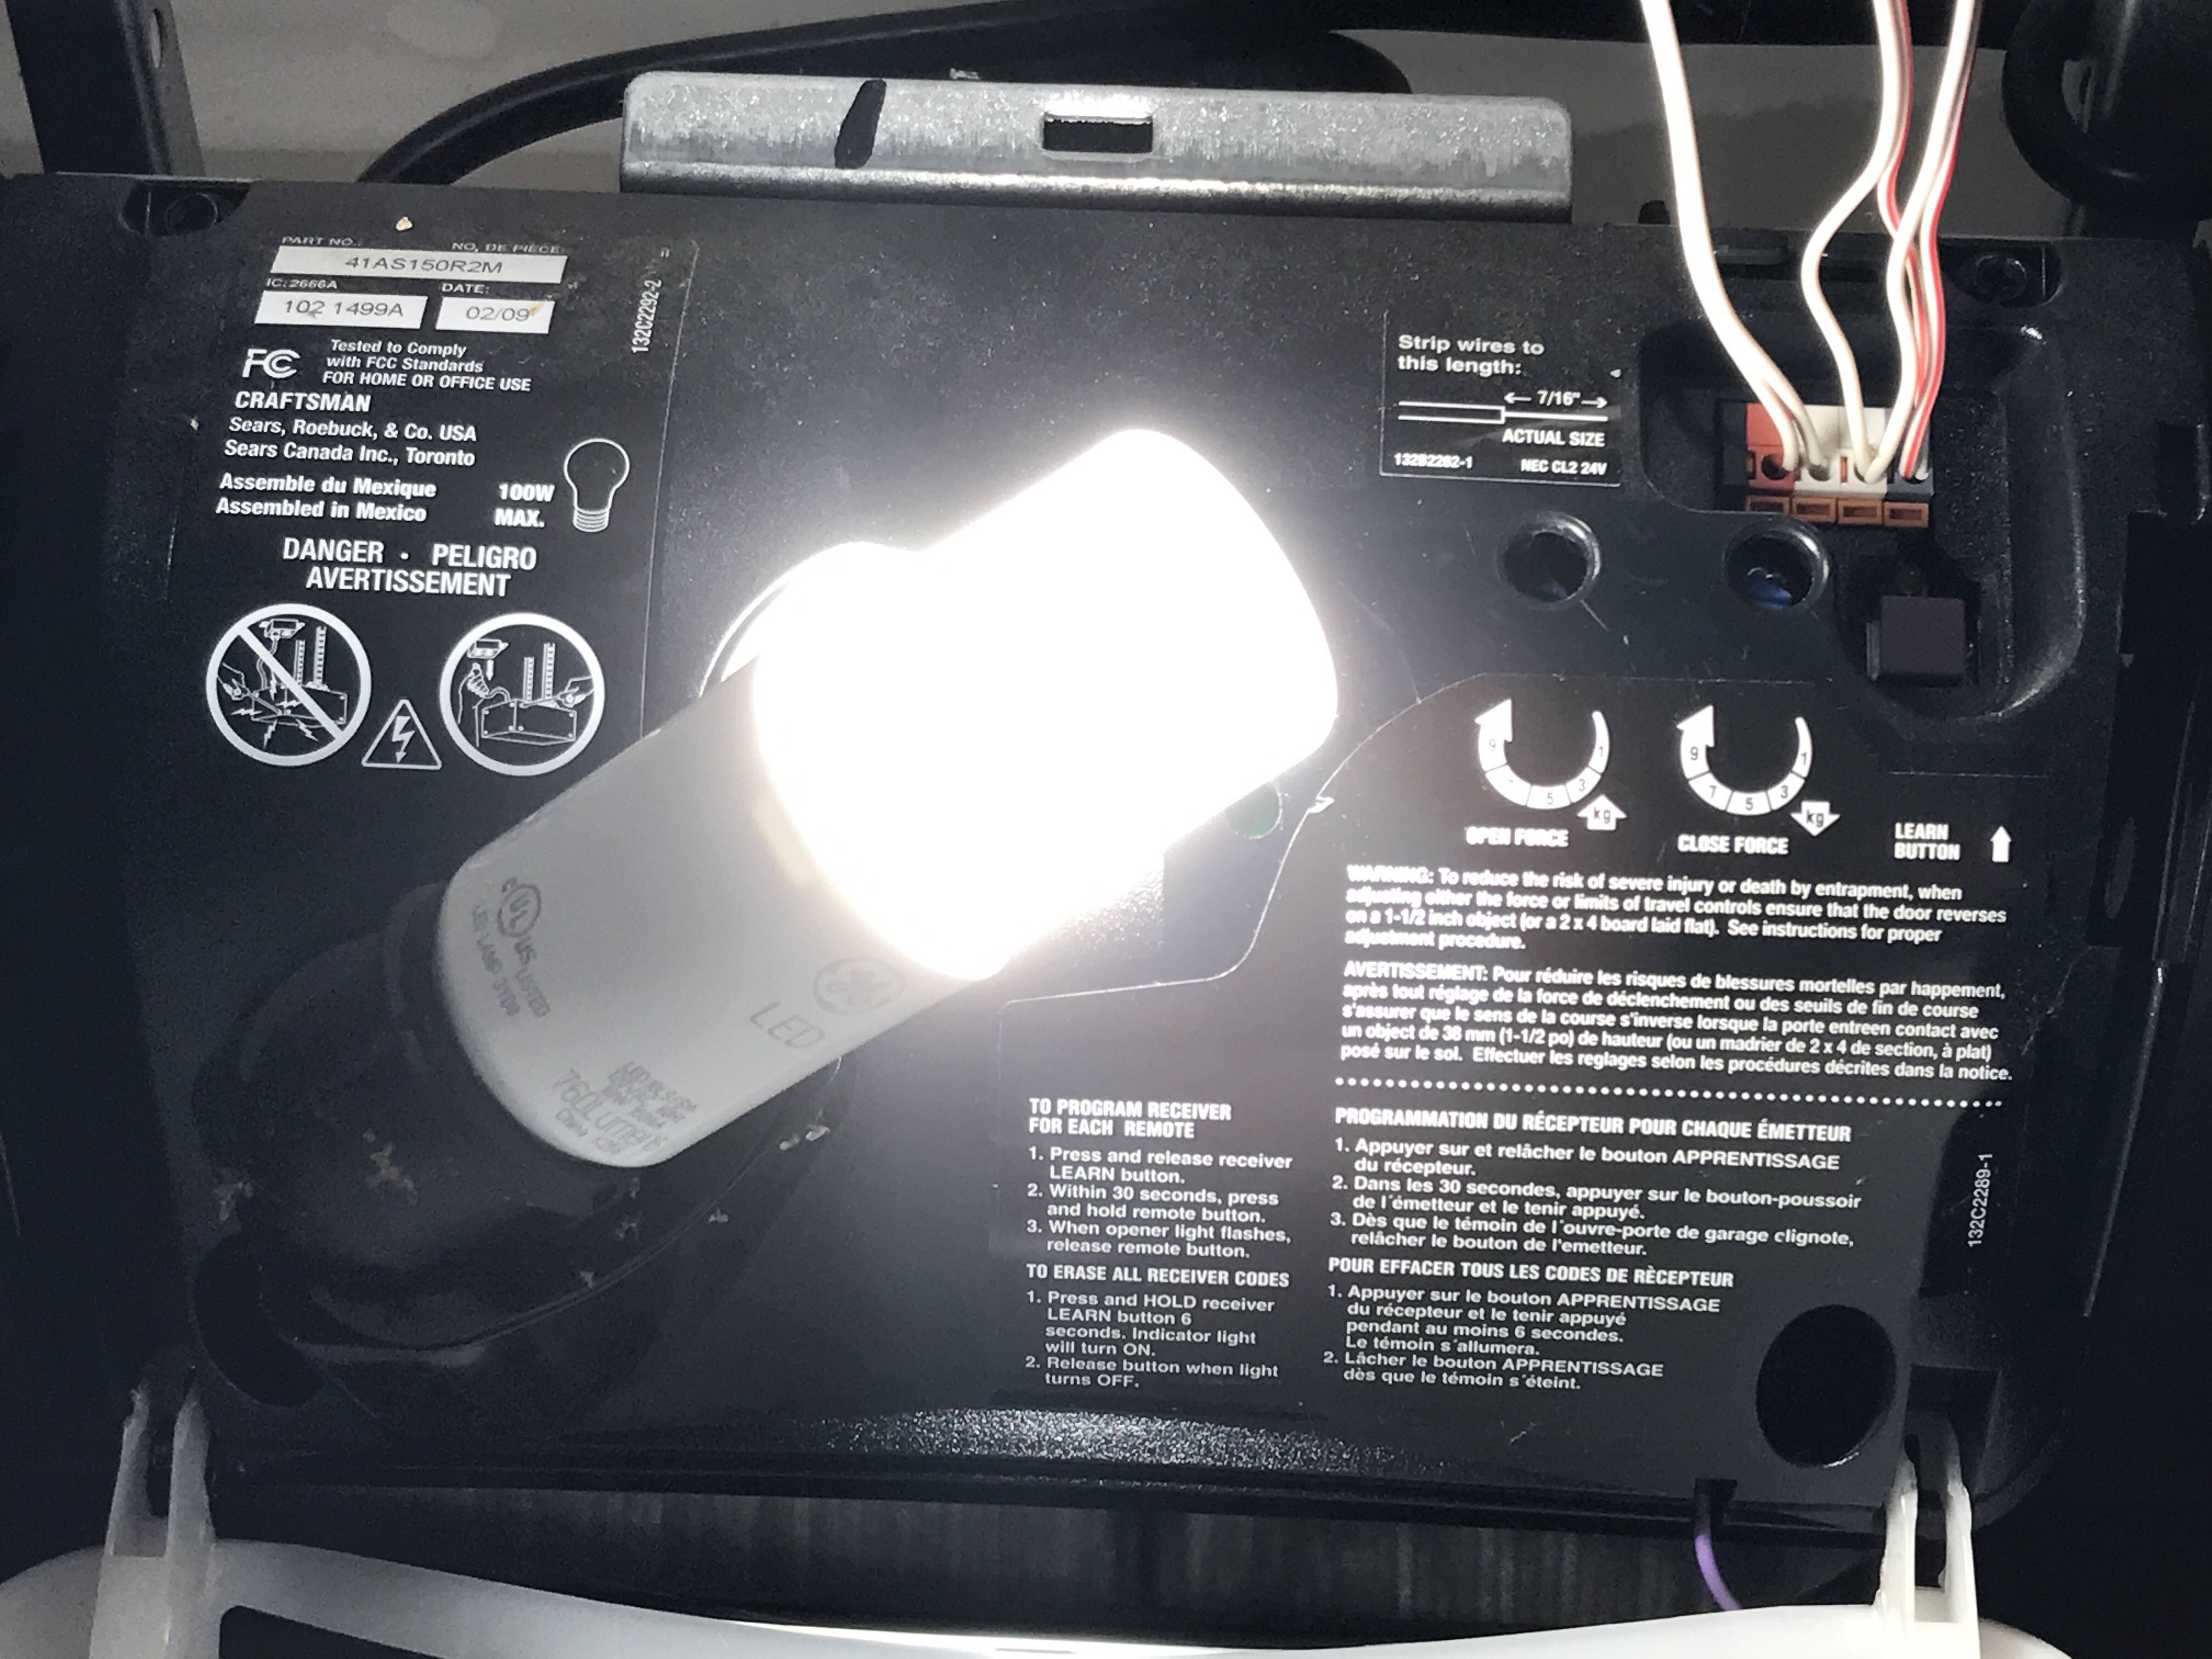
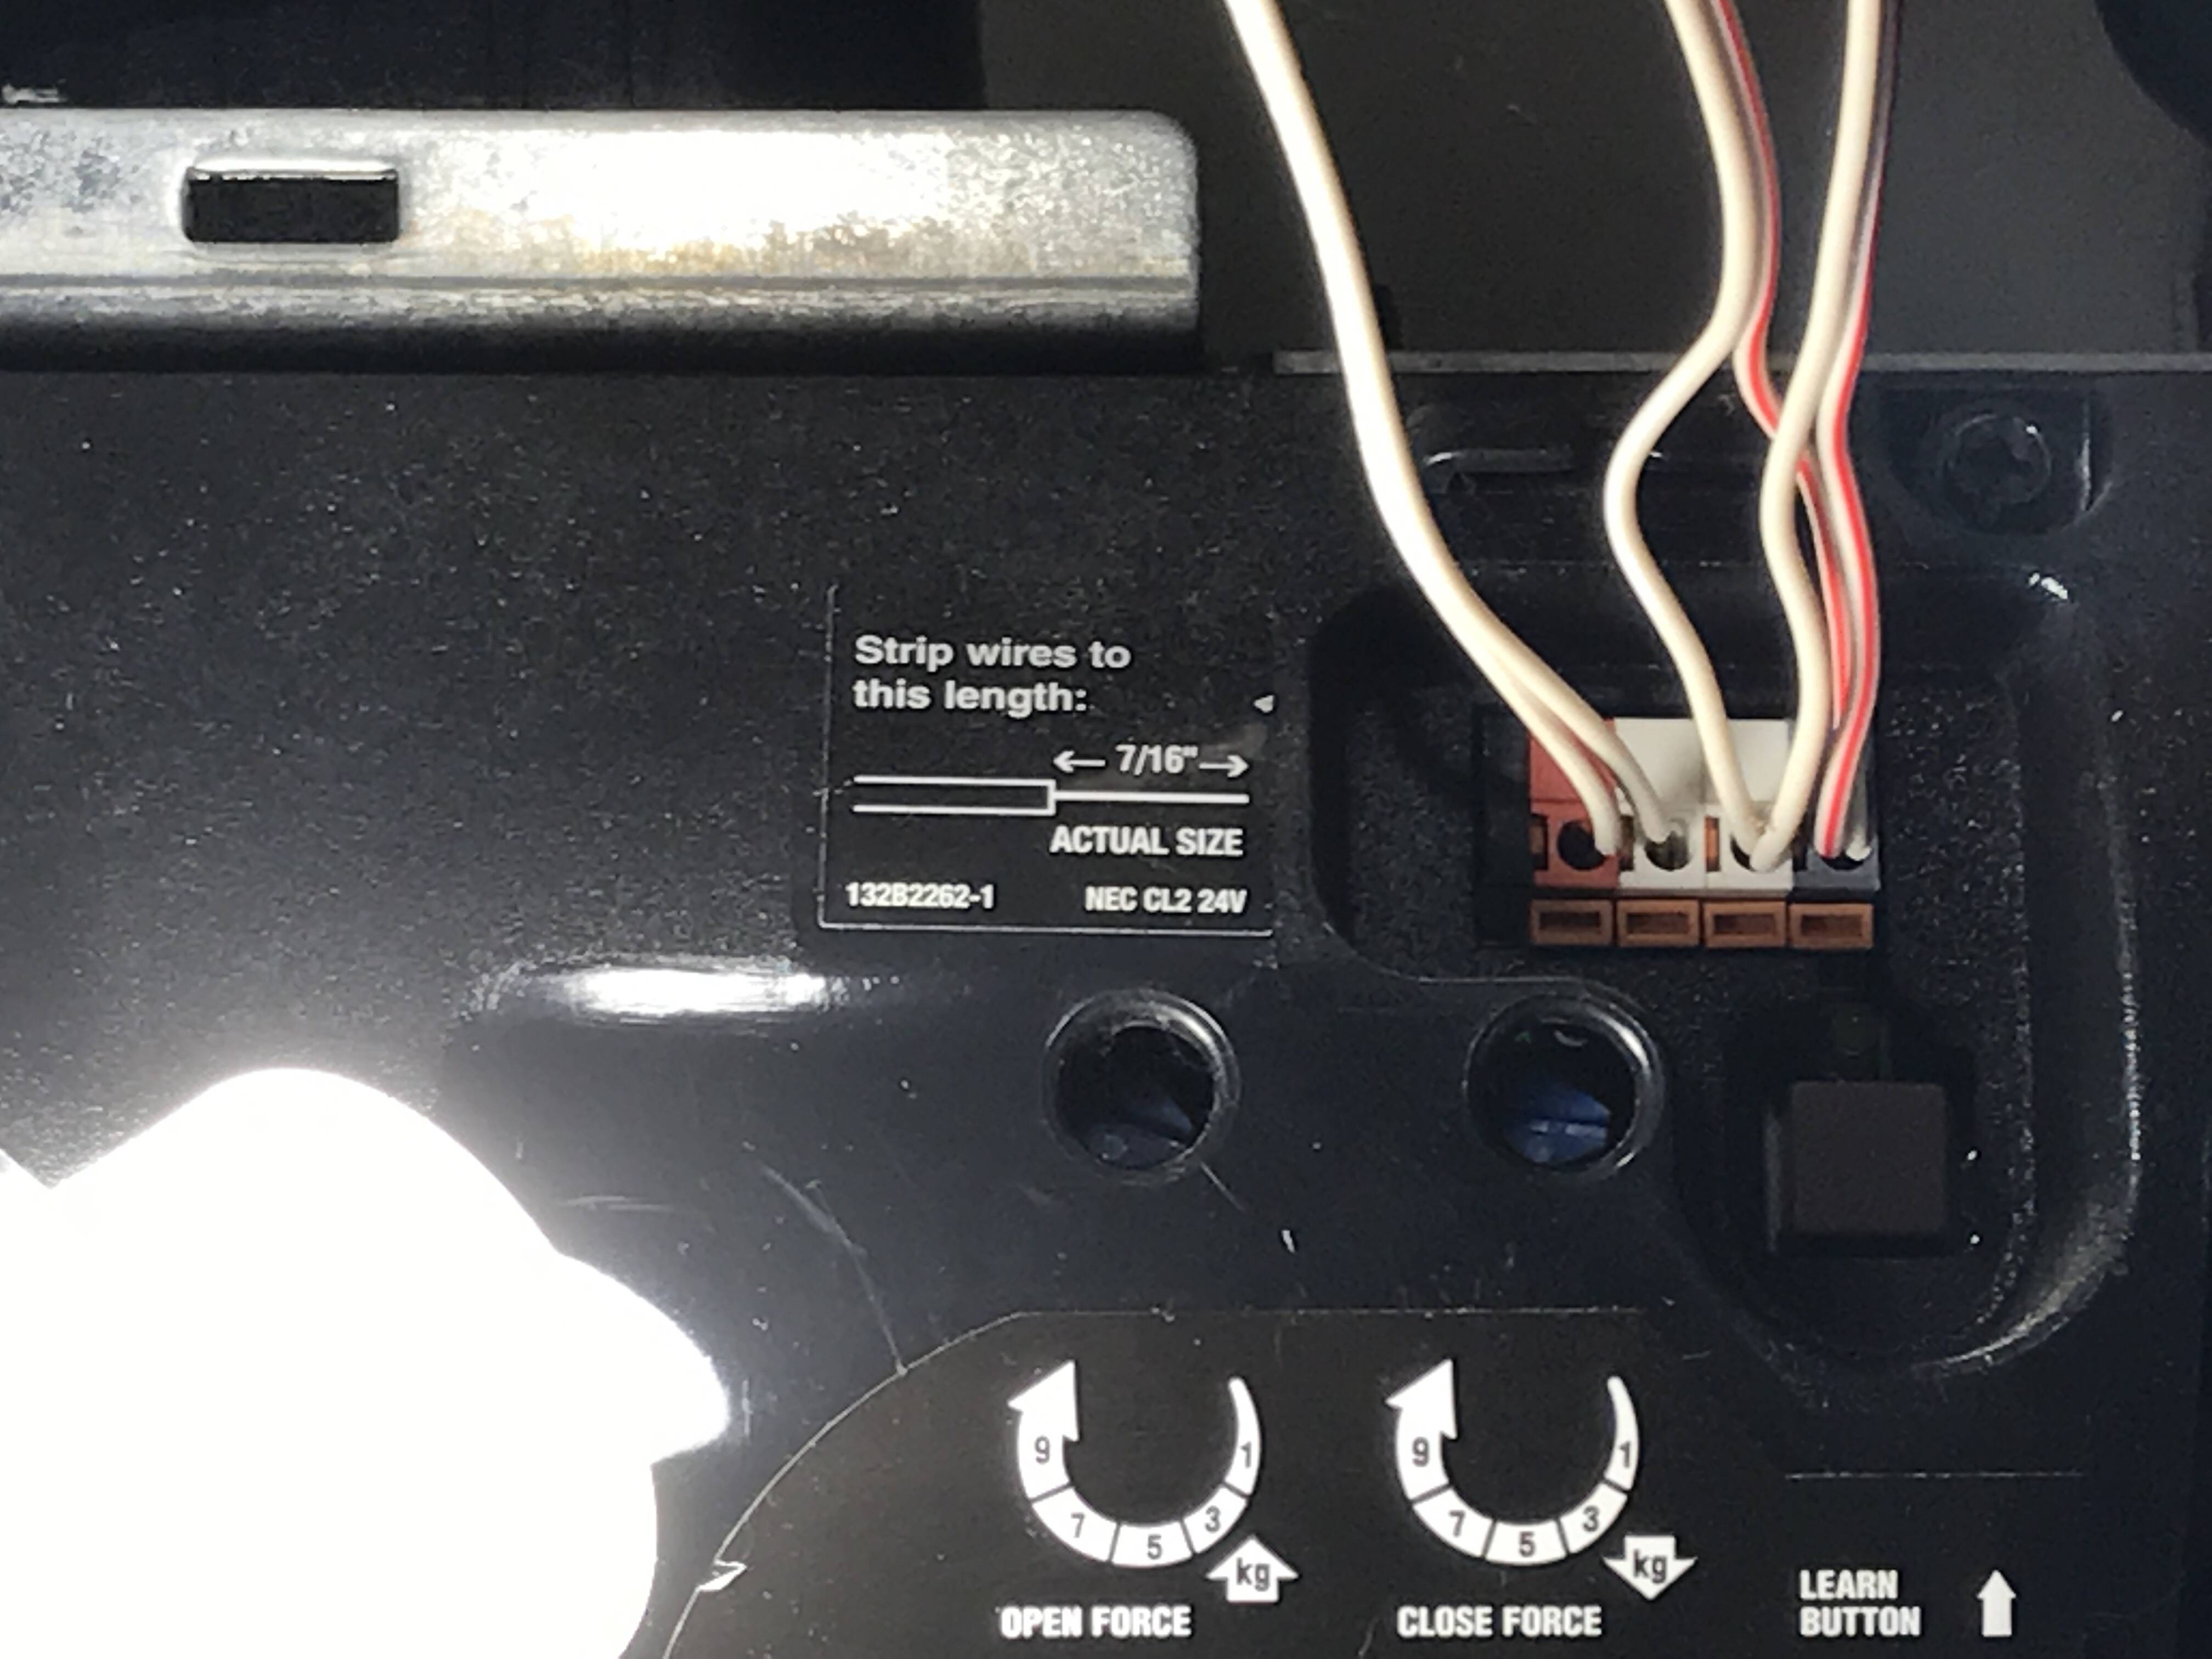
I’m at a loss for what I need to do to connect my Garadget with my 1/2hp craftsman (2009 model). Any help is appreciated!
Pictures:
---
### Author:  [@ms-informatique](https://community.garadget.com/u/ms-informatique)
#### Post date: [October 25, 2016, 7:48am UTC](https://community.garadget.com/t/installation-with-craftsman/575/2 "2016-10-25T07:48:39Z")
You should have a look into [https://www.searspartsdirect.com/partsdirect/user-manuals/1395364812-craftsman-parts-garage-door-opener-parts-manual](https://www.searspartsdirect.com/partsdirect/user-manuals/1395364812-craftsman-parts-garage-door-opener-parts-manual) ; Page 17 into pdf.
---
### Author:  [@nite](https://community.garadget.com/u/nite)
#### Post date: [October 25, 2016, 8:05am UTC](https://community.garadget.com/t/installation-with-craftsman/575/3 "2016-10-25T08:05:59Z")
I don’t believe that’s the same model as mine though. Does that make a difference?
---
### Author:  [@ms-informatique](https://community.garadget.com/u/ms-informatique)
#### Post date: [October 25, 2016, 9:01am UTC](https://community.garadget.com/t/installation-with-craftsman/575/4 "2016-10-25T09:01:19Z")
> [@nite](#):
>
> Does that make a difference?
Only Craftsman can answer this question. Most probably they have kept the same configuration but I can’t guarantee this.
How do you open the garage door as of today? Do you have only a remote or you have also a button somewhere?
---
### Author:  [@garadget](https://community.garadget.com/u/garadget)
#### Post date: [October 25, 2016, 9:40am UTC](https://community.garadget.com/t/installation-with-craftsman/575/5 "2016-10-25T09:40:32Z")
Two on the left are the ones for the wall button. That’s where you connect your Garadget.
---
### Author:  [@nite](https://community.garadget.com/u/nite)
#### Post date: [October 25, 2016, 7:09pm UTC](https://community.garadget.com/t/installation-with-craftsman/575/6 "2016-10-25T19:09:30Z")
So do I remove the existing wires on there or do I just add the garadget’a wire in there with the existing wires?
---
### Author:  [@garadget](https://community.garadget.com/u/garadget)
#### Post date: [October 25, 2016, 7:22pm UTC](https://community.garadget.com/t/installation-with-craftsman/575/7 "2016-10-25T19:22:58Z")
Existing wires are connected to the wall button. You want to keep them where they are. Just double up Garadget wires with them.
---
### Author:  [@nite](https://community.garadget.com/u/nite)
#### Post date: [October 25, 2016, 7:24pm UTC](https://community.garadget.com/t/installation-with-craftsman/575/8 "2016-10-25T19:24:44Z")
Sounds good, thank you! I also saw that you have someone working on Home Assistant integration. How’s that coming?
---
### Author:  [@garadget](https://community.garadget.com/u/garadget)
#### Post date: [October 25, 2016, 7:36pm UTC](https://community.garadget.com/t/installation-with-craftsman/575/9 "2016-10-25T19:36:52Z")
It sounds like the developer is making good progress, and Garadget integration has a good chance of making it into the official release. Looking forward to it.
---
### Author:  [@nite](https://community.garadget.com/u/nite)
#### Post date: [October 25, 2016, 10:19pm UTC](https://community.garadget.com/t/installation-with-craftsman/575/10 "2016-10-25T22:19:06Z")
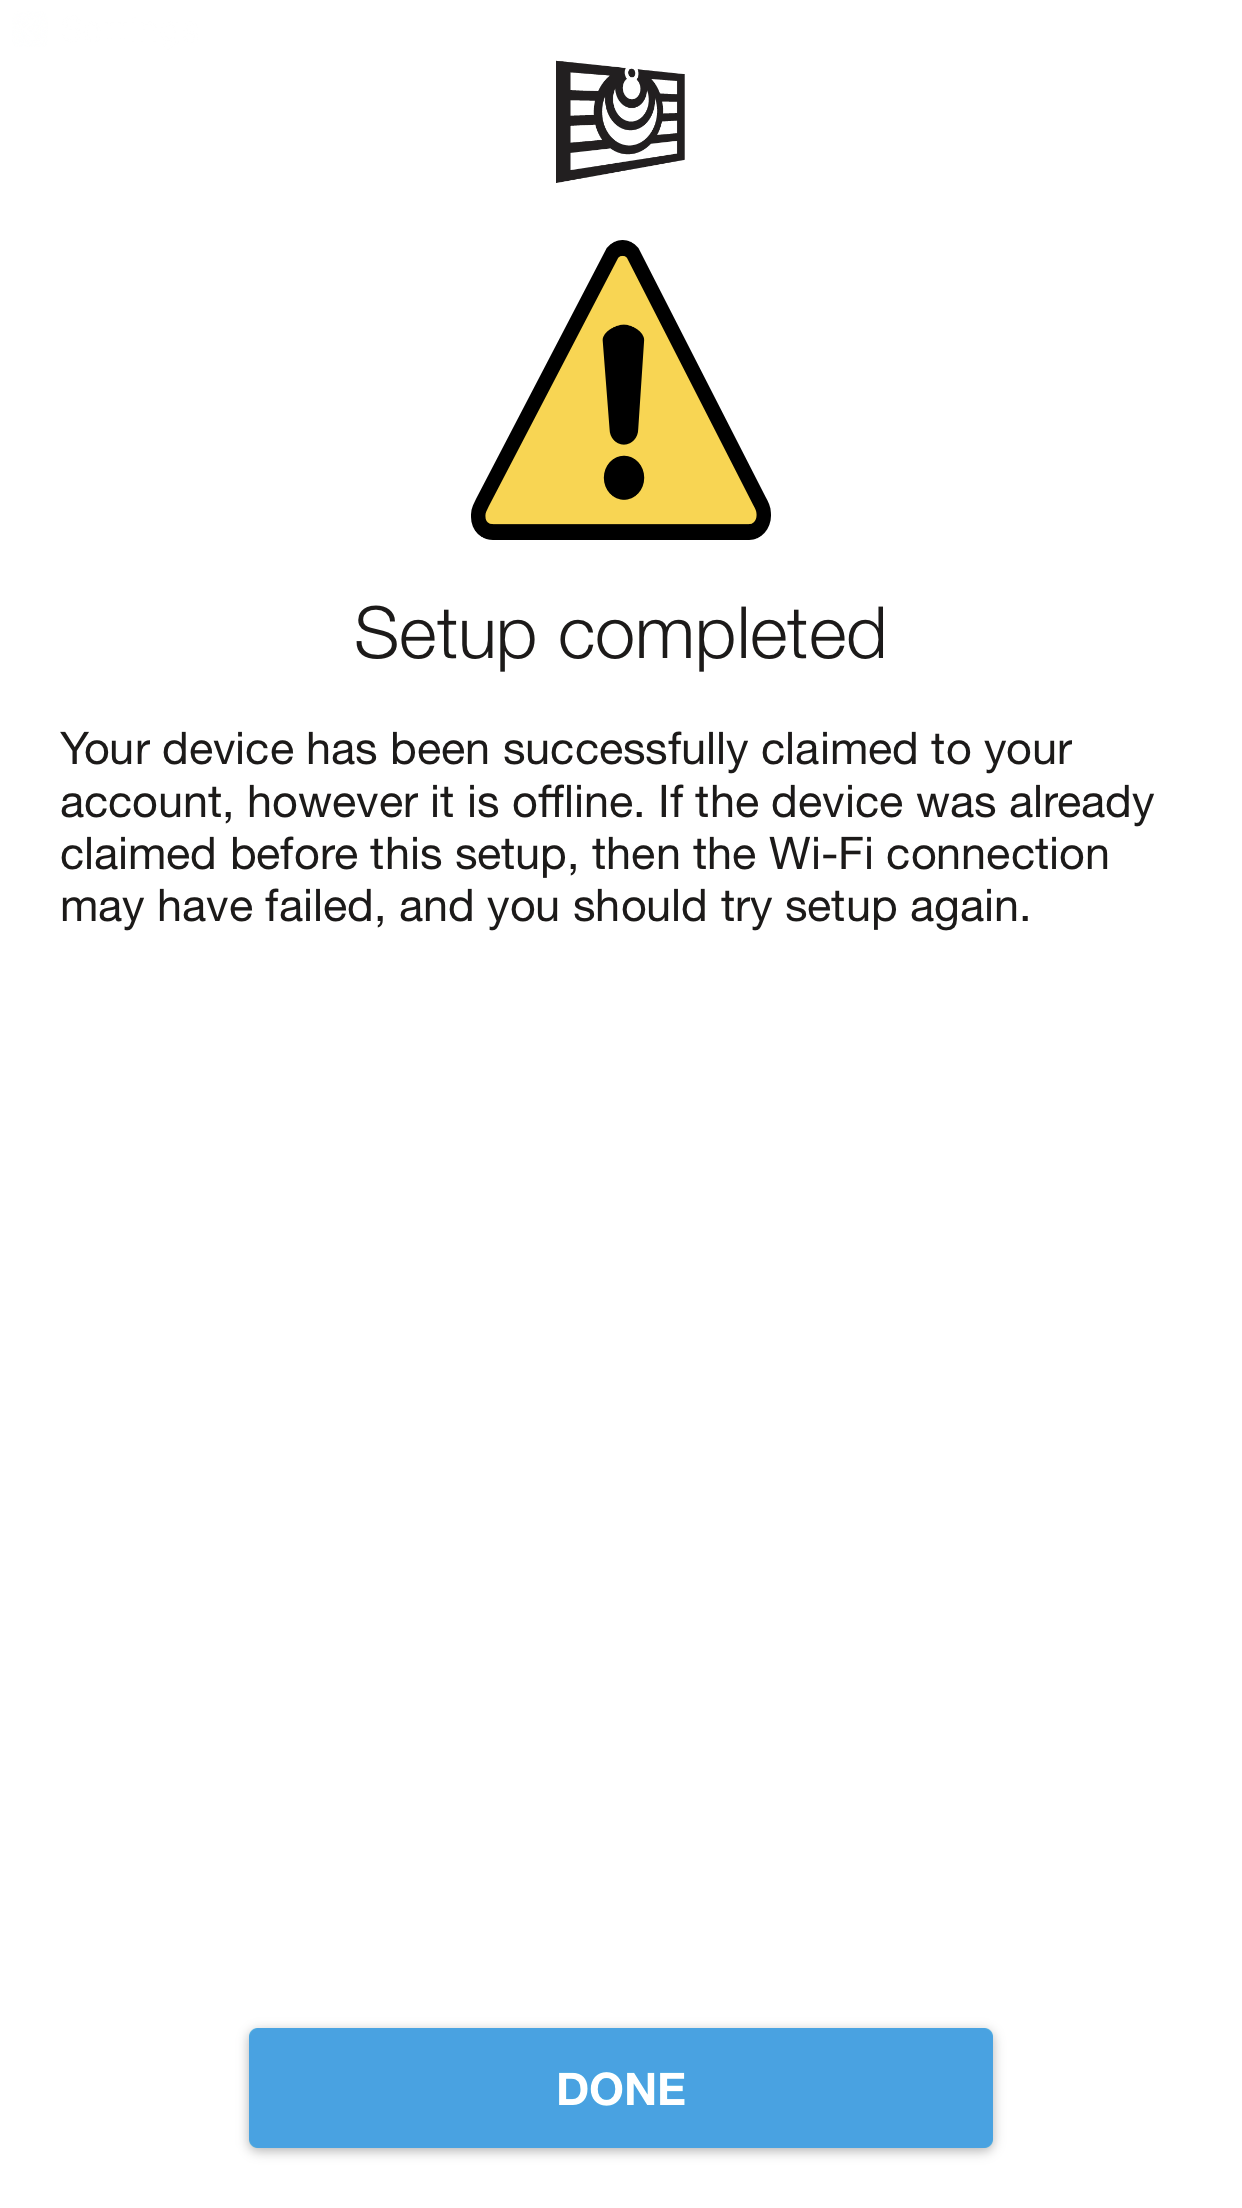
So I tried setting it up and I’m having issues with the wifi. I connected it and it kept saying the door was offline so I reset it and tried it again. Now it’s finishing set up but throwing this error at me refusing to go online.
---
### Author:  [@nite](https://community.garadget.com/u/nite)
#### Post date: [October 25, 2016, 10:45pm UTC](https://community.garadget.com/t/installation-with-craftsman/575/11 "2016-10-25T22:45:20Z")
I figured it out! Used the web app to configure it instead.
---
### Author:  [@joshgibson](https://community.garadget.com/u/joshgibson)
#### Post date: [January 29, 2018, 12:40am UTC](https://community.garadget.com/t/installation-with-craftsman/575/12 "2018-01-29T00:40:17Z")
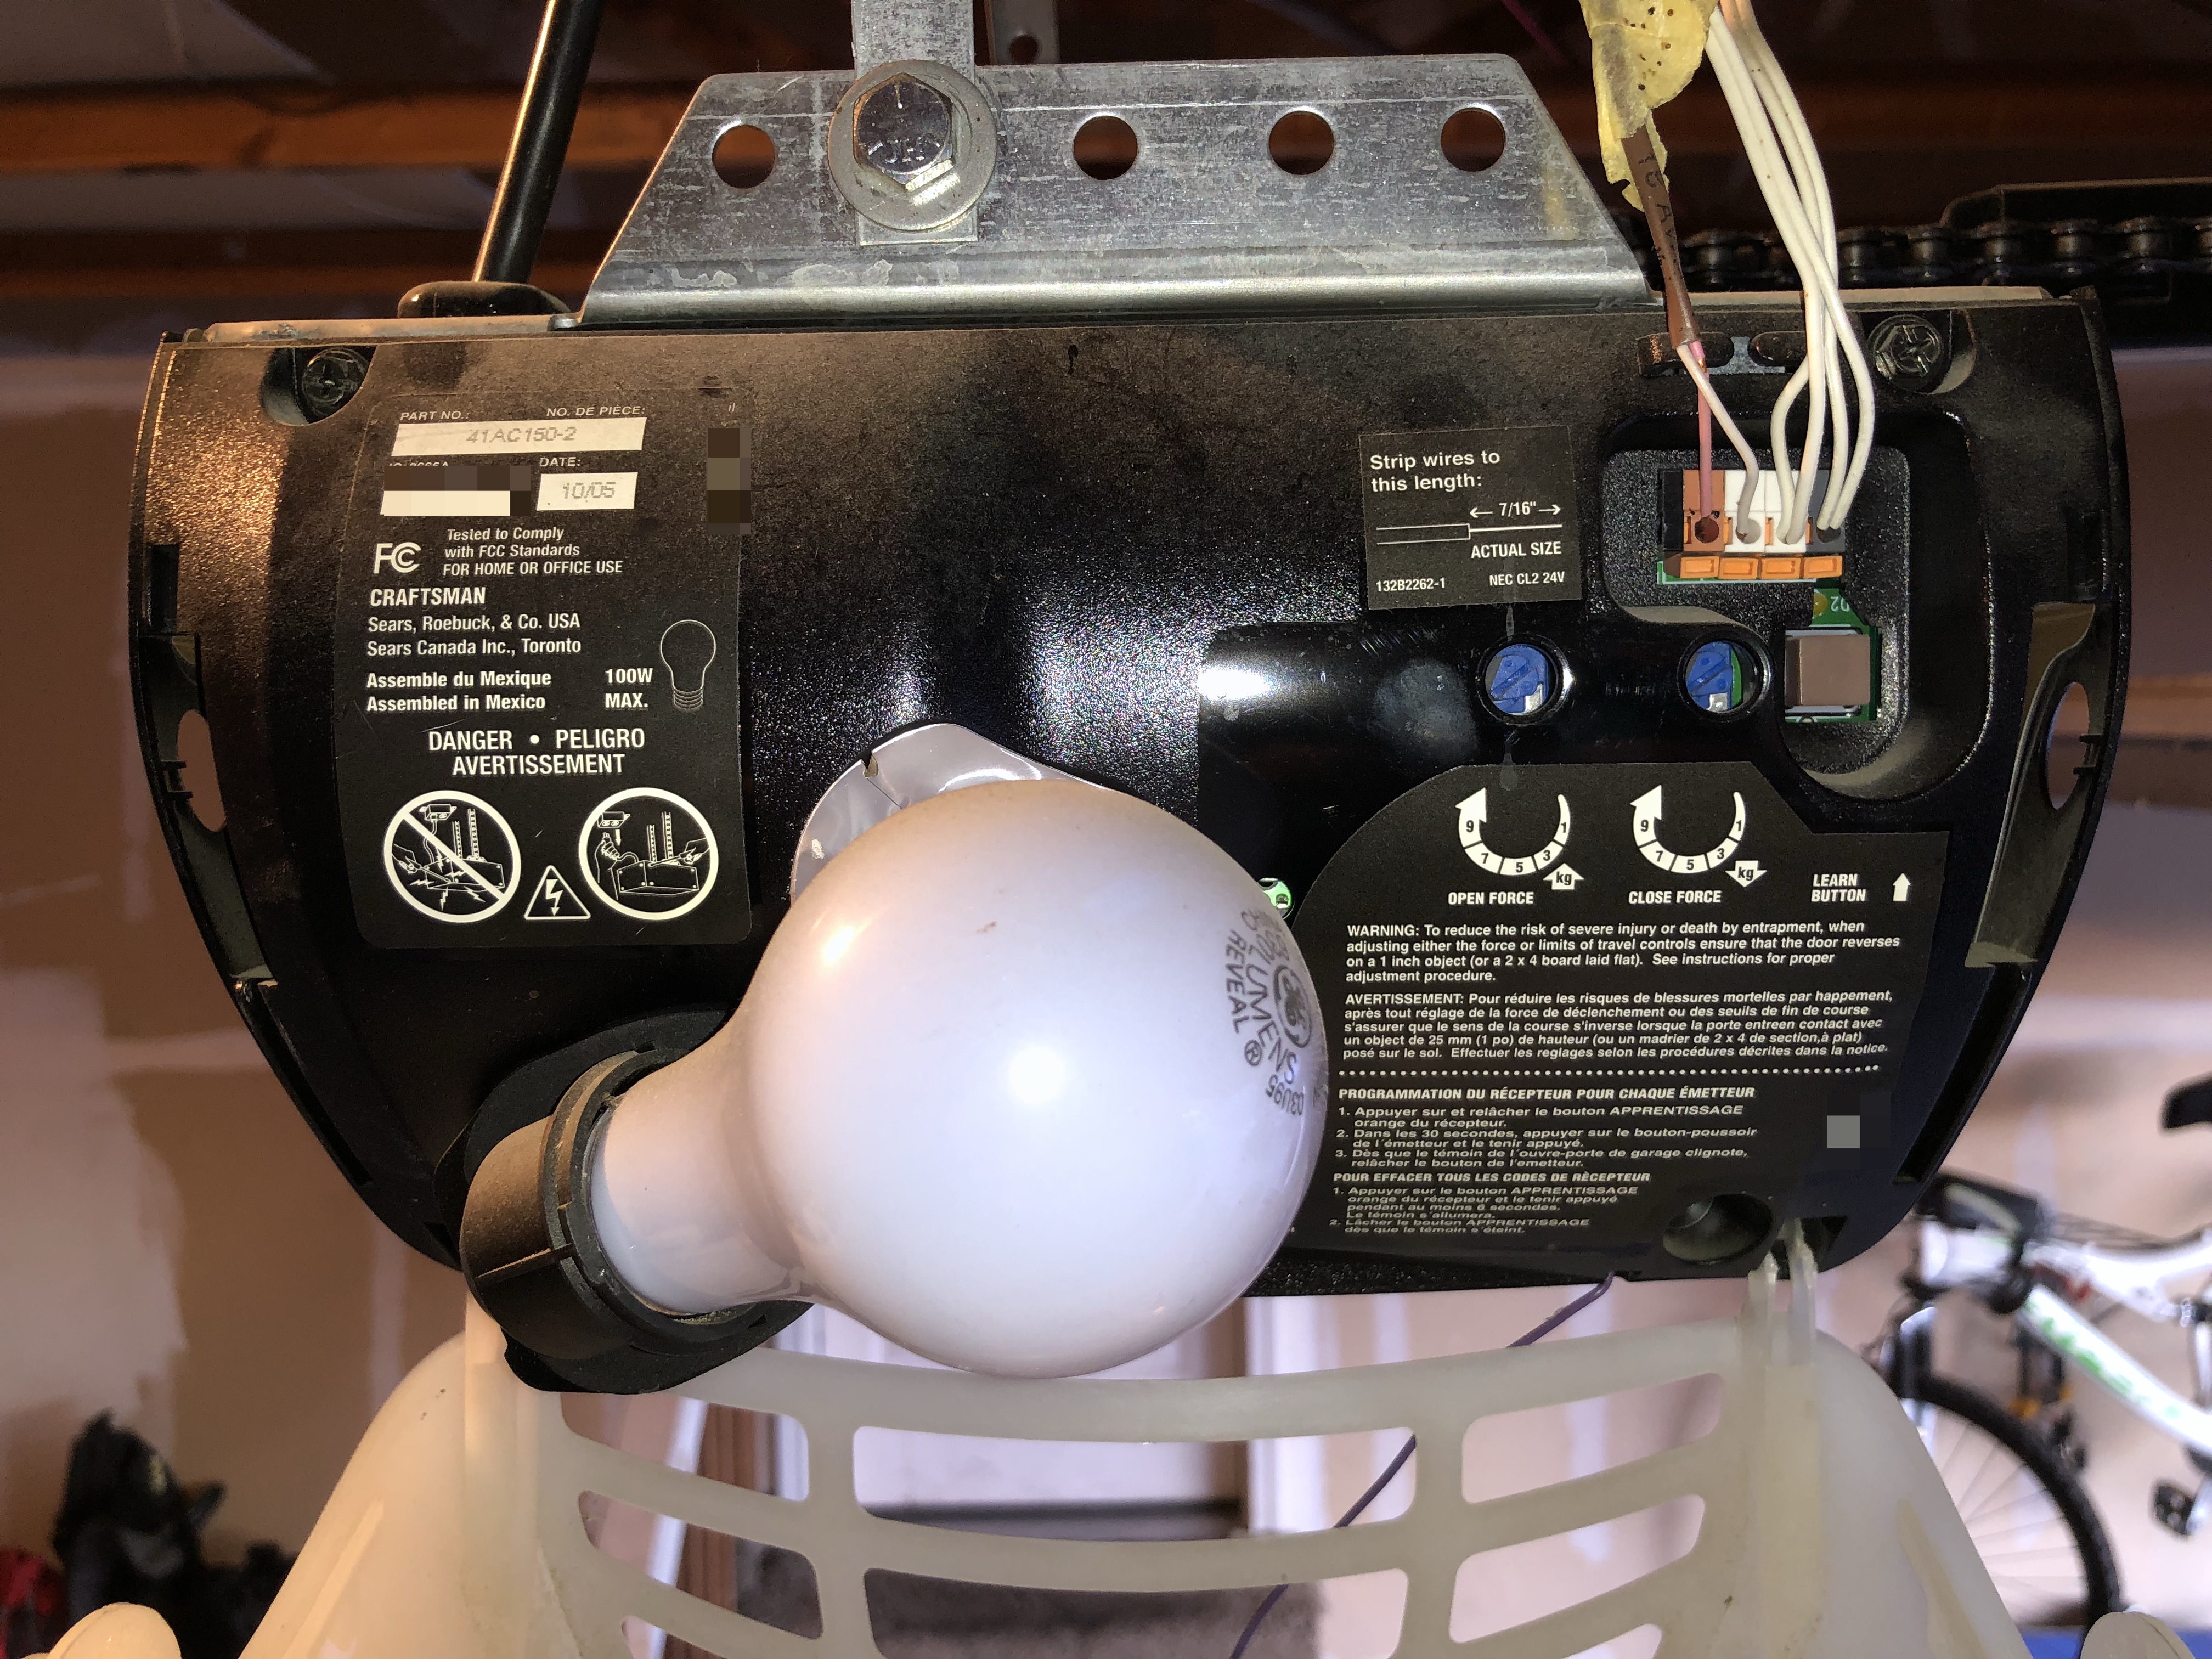
I’ve also got a Craftsman 1/2HP, but I’m still confused on how to connect the wires. Do I just mash in the garage wires into the same holes that already have my button? Or do I need to connect them some other way?
---
### Author:  [@garadget](https://community.garadget.com/u/garadget)
#### Post date: [January 29, 2018, 4:11pm UTC](https://community.garadget.com/t/installation-with-craftsman/575/13 "2018-01-29T16:11:29Z")
Josh,
Garadget wire goes in first two terminals on the left along with the existing wall console connection. The completed connection will look somewhat similar to the obstacle sensor wiring in the terminals on the right.
For the reliable contact I’d suggest twisting Garadget wires with corresponding wall console wires before inserting them into the terminal.
---
### Author:  [@joshgibson](https://community.garadget.com/u/joshgibson)
#### Post date: [January 29, 2018, 6:37pm UTC](https://community.garadget.com/t/installation-with-craftsman/575/14 "2018-01-29T18:37:43Z")
Great thanks, I’ll give that a go as soon as I get home.
---
### Author:  [@Edu\_Mart](https://community.garadget.com/u/Edu_Mart)
#### Post date: [January 14, 2024, 10:47pm UTC](https://community.garadget.com/t/installation-with-craftsman/575/16 "2024-01-14T22:47:42Z")
Hello.
Can I steal this thread with a related question please?
My garage door opener motor is very similar to the one from the picture posted here.
A cable with 2 wires come from the wall console to the motor inputs. But only the large button to open/close the door works. The button for switching the lights on and off from the console do not.
How is the light switch supposed to work with only two wires connecting the wall console with the motor?
Thanks all
Ed
---
### Author:  [@Remi\_St-Onge](https://community.garadget.com/u/Remi_St-Onge)
#### Post date: [November 11, 2025, 5:06pm UTC](https://community.garadget.com/t/installation-with-craftsman/575/17 "2025-11-11T17:06:38Z")
First, unplug the device, then plug in the wall switch. You will need to press the bottom tab with a tool to insert the wires fully. The remote control wire consists of a red and a white wire. The red wire should be inserted into the red hole on the far left, and the white wire immediately to its right into the second hole.
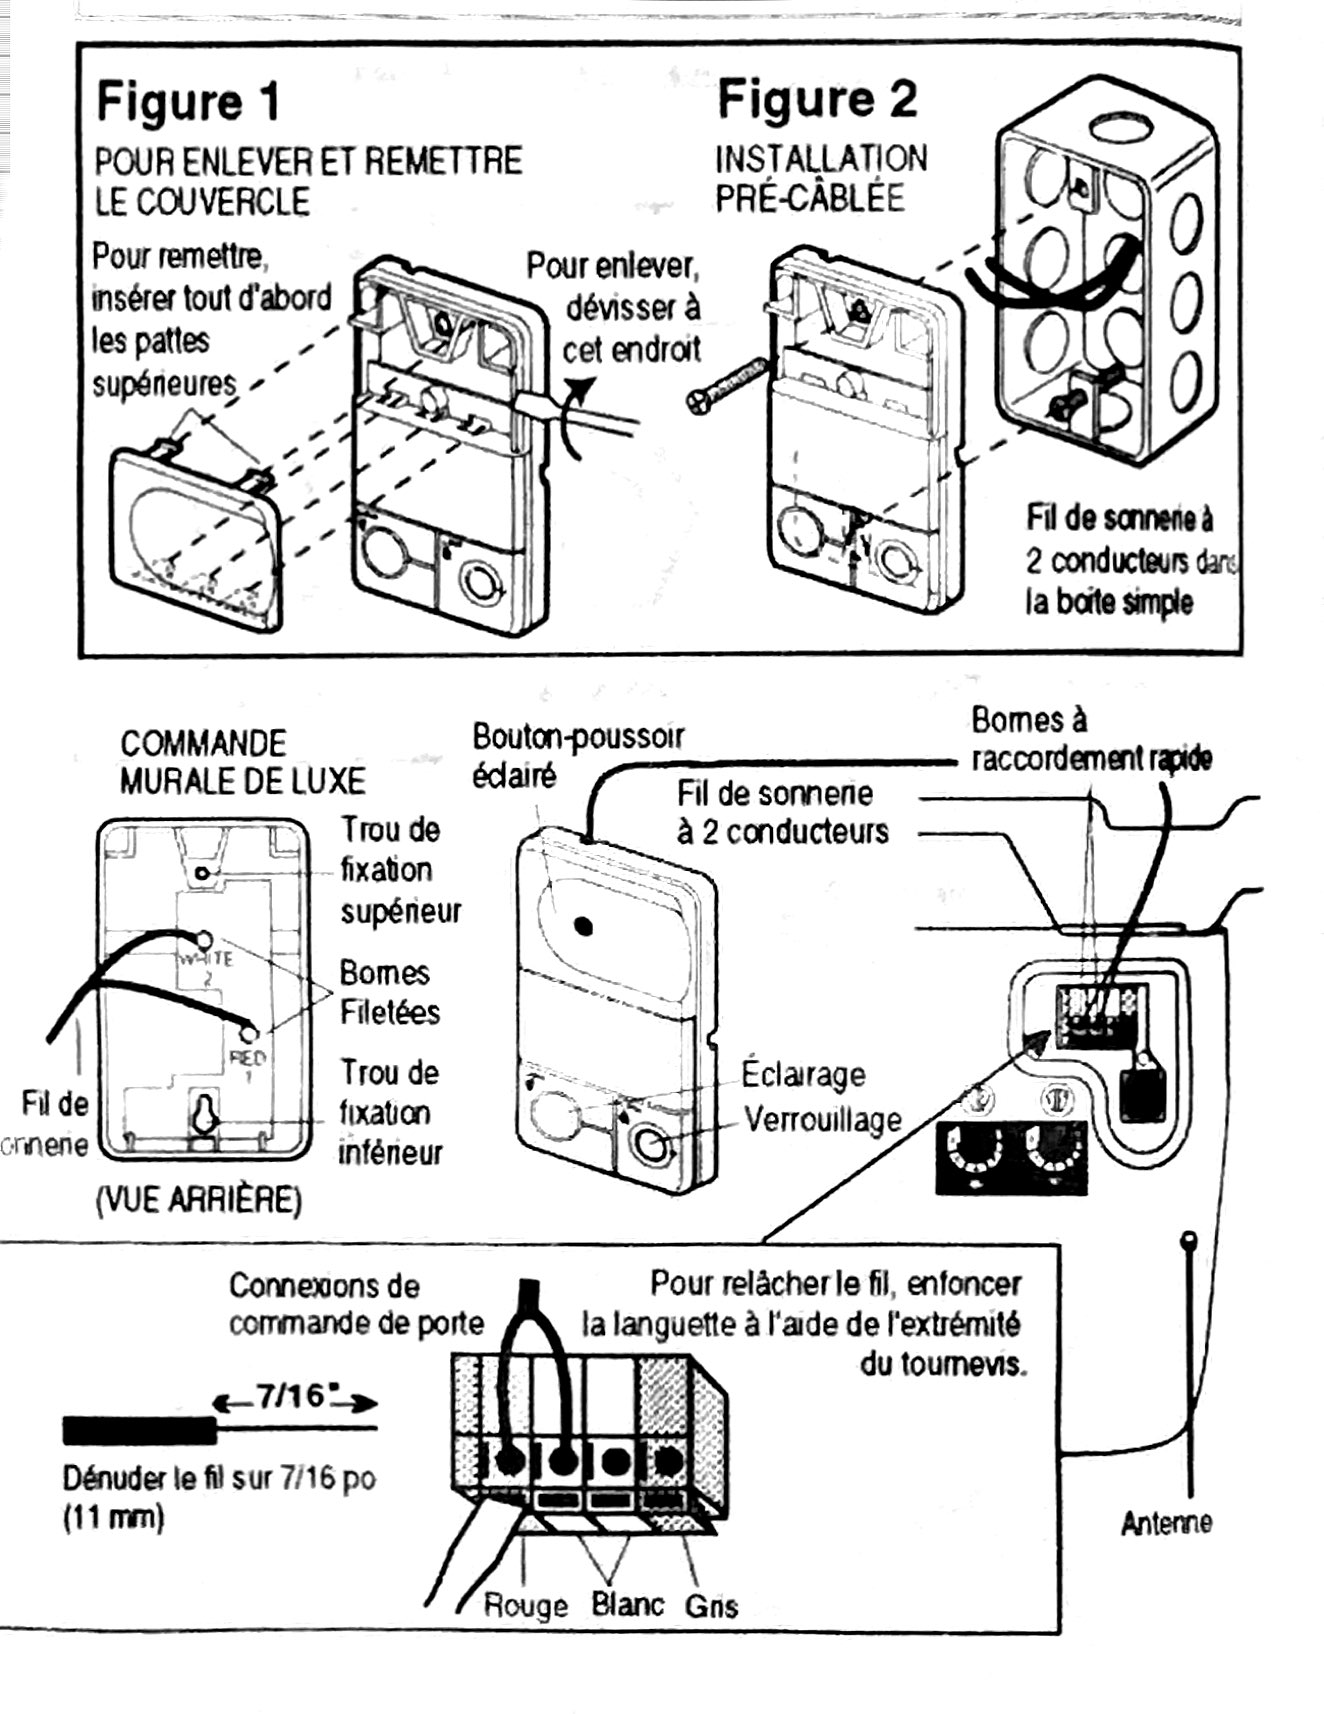
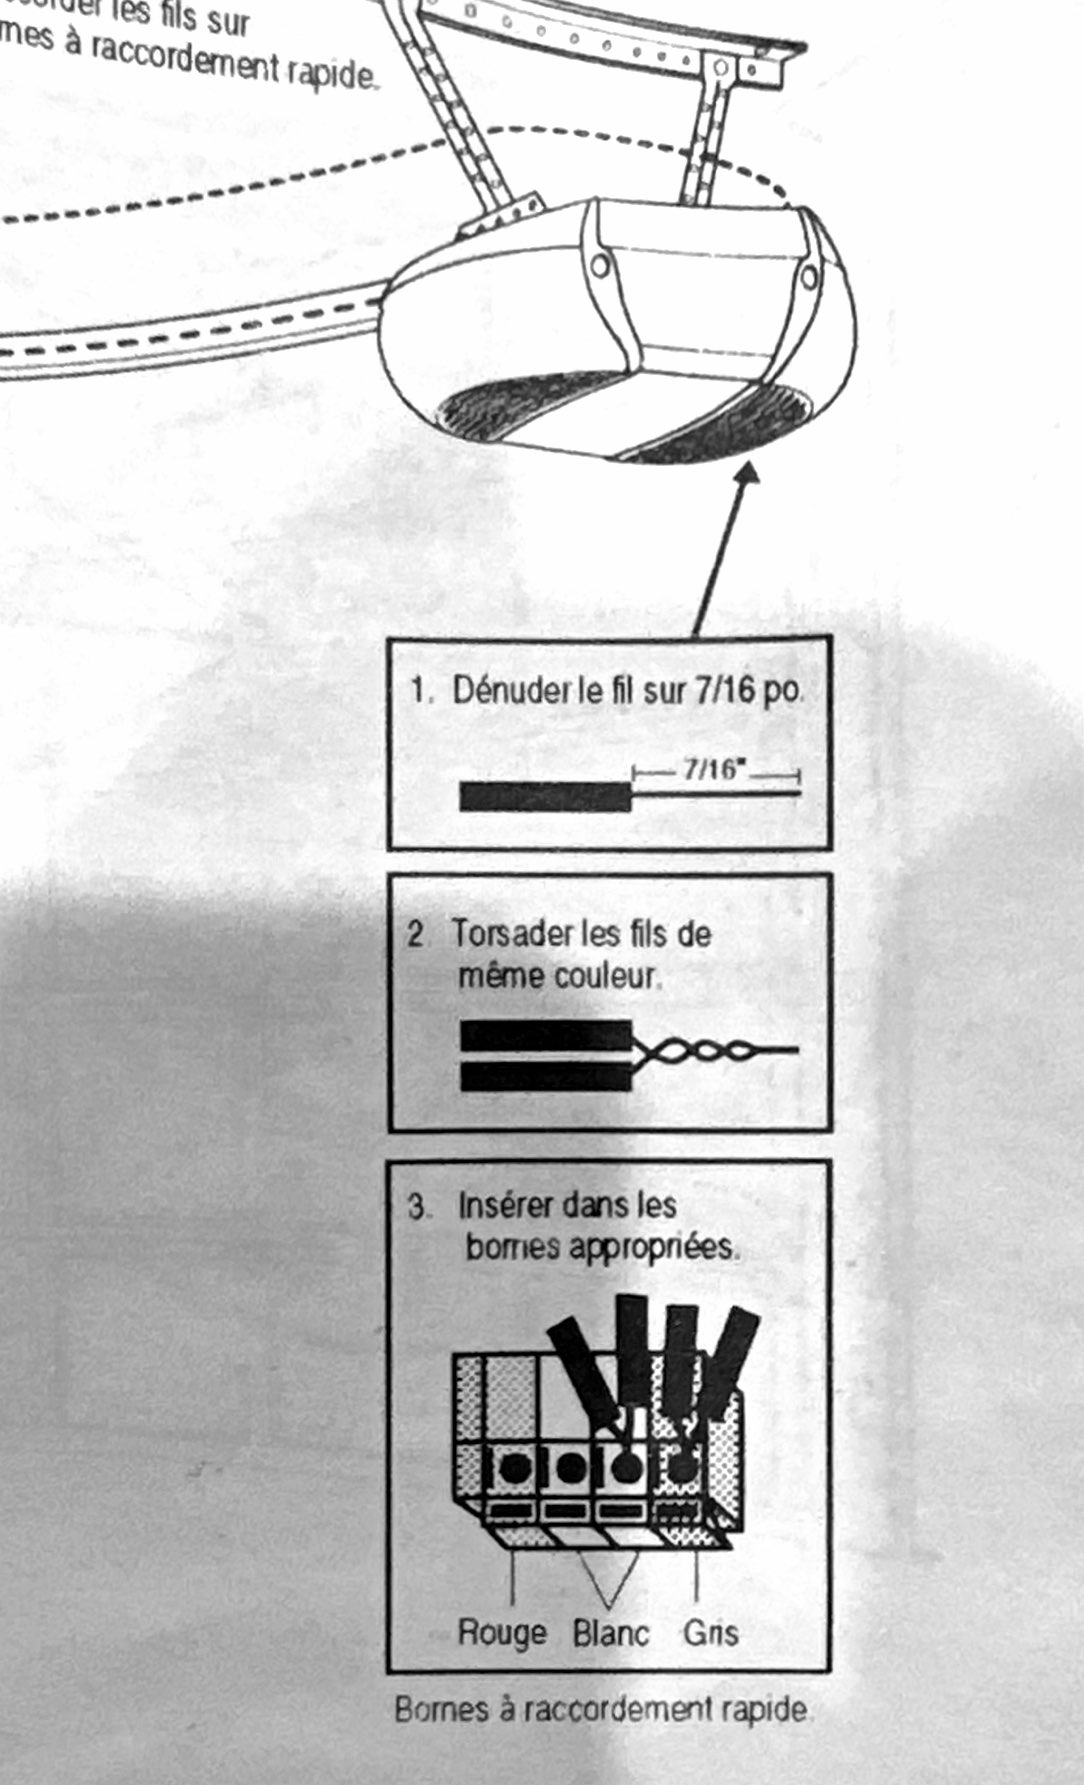
The detector wires consist of one black and one white wire. Twist the wires of the same color together. Then insert the first twisted pair of white wires into the empty white terminal (the third from the left) and the second twisted pair of black wires into the empty gray terminal (the fourth and last).
Reconnect and check that the lights on the wall-mounted controller and the detectors are illuminated.
You may need to reprogram your mobile controllers using the “Learn” button on the device.