Sommer’s Direct Drive garage door opener has been perfect for my garage, which sits directly beneath my kids’ rooms. These things are the quietest garage door opener available. I would definitely recommend it if noise is a concern.
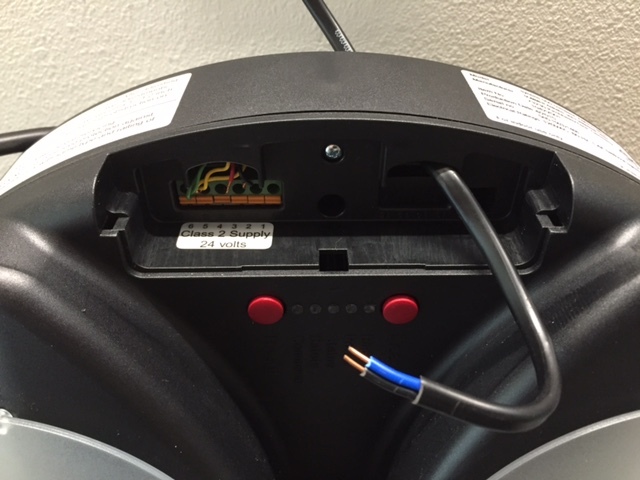
Installation of Garadget was pretty easy. First, I removed the blue plastic cover at the rear of the opener housing to expose the wire connections. I verified that the supplied wires for the Garadget would fit through the cable access hole on the top of the unit and are long enough for installation.
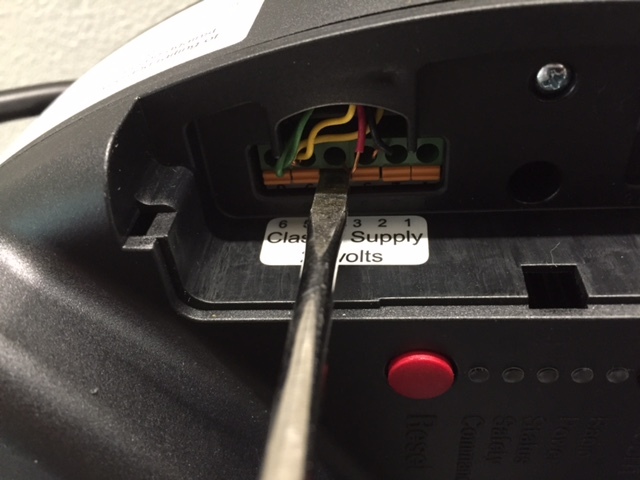
The wires will need to be connected to terminals 3 and 4. This should be where your existing wall switch is already connected. Using a flathead screwdriver, press in on the terminal until the wire pulls out.
You may need to strip off the end of the supplied Garadget wires to expose more of the wire before inserting into the terminals. I took my existing wires and wrapped one around each of Garadget’s wires before pressing them firmly back into the terminals. It does not matter which Garadget wire goes where, but make sure you return the wall button wires to the same terminals. Give it a gentle tug to make sure the wires are inserted securely. If it pulls out, try again. After pulling the cables up through the housing, it looked like this:
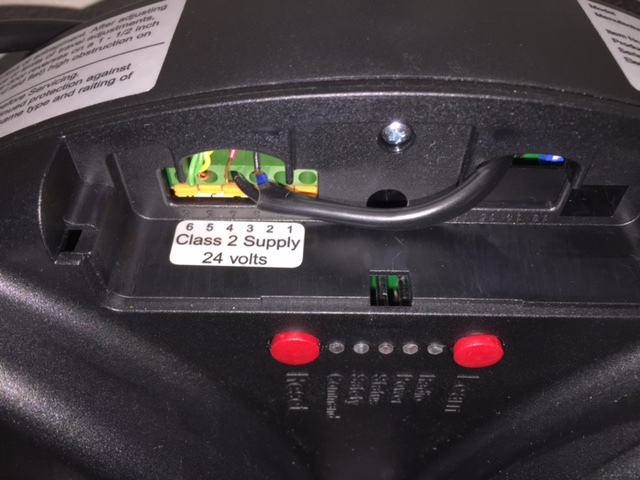
Slide the blue cover plate back into place.
I decided to let the cables to the Garadget wrap around the back and up the center of the device. It is the perfect length to affix the Garadget in the front center of the opener. Make sure you leave a little slack in the cable so it’s not pulled too tight, and so you can still remove the blue cover plate again if necessary, without having to unscrew the Garadget terminals first.
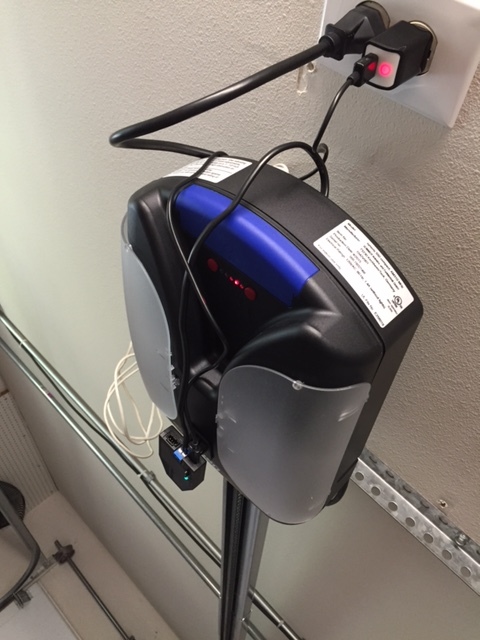
Following the rest of the Garadget installation instructions, here’s my final result.
you can power Garadget from opener’s 24V if the source is interrupted. Search ebay for “step down to USB” or “step down to 5V” and there are plenty of choices under $3 shipped.
“It does not matter which wire goes where” is correct for the wires coming out of Garadget, but those from the wall button must return to their exact previous locations. The wall button has LED and electrolytic capacitors which will not enjoy the reversed polarity.
I think the Sommer drive in your photo is a later one than mine, but mine – with a red cover for the connections and without “rolling codes” – works just the same.
I’ve discovered that even when the opener is “locked” with the wall switch it can still be controlled with the Garadget app. Not a problem, but interesting.
It’s possible that this has to do with the duration of the pulse.
You can try different settings of “Relay On Time” to see if that makes the difference.
Update: I’ve had two out of three of my sensors come detached from the opener housing, likely due to vibrations and daily use. I tried replacing the sticky pad, but it fell off again within a week. The double sided tape included with the kit should be considered temporary! I opted to screw the garadget into the ceiling instead, and have had zero problems with laser drift or detachment since.