Congratulations on your new Garadget!
Let’s get started with the setup which will consists of account setup and controller installation. The process is quite simple, and this 10 minutes read will guide you around some of the potential “gochas”. Please refer to troubleshooting guide if you encounter any problems.
Your complete kit should include:
- Garadget controller
- USB power adapter
- micro-USB cable
- 2 double-sided adhesive pads
- 2 adhesive reflective pads
- approx 0.5m of 2 wire control cable
- mini screwdriver
Account Setup
Requirements
For successful account setup you’ll need:
- Garadget controller
- Internet connected smartphone, tablet or WiFi capable computer with modern web browser
- WiFi hot spot with robust signal at the installation location
- Email account not previously used with other Particle Cloud based products
 Important Note
While disconnecting the USB connector, please always pull it straight out, even if it feels stuck. Aggressively wobbling connector up and down will damage the board. If this happens, we’ll handle the repair under the warranty, but the process may take 4-10 days.
Setup Steps
Depending on the platform of your choice please install and/or open one of the following Garadget apps:
Here’s the video of the account setup process taking under 2 minutes:

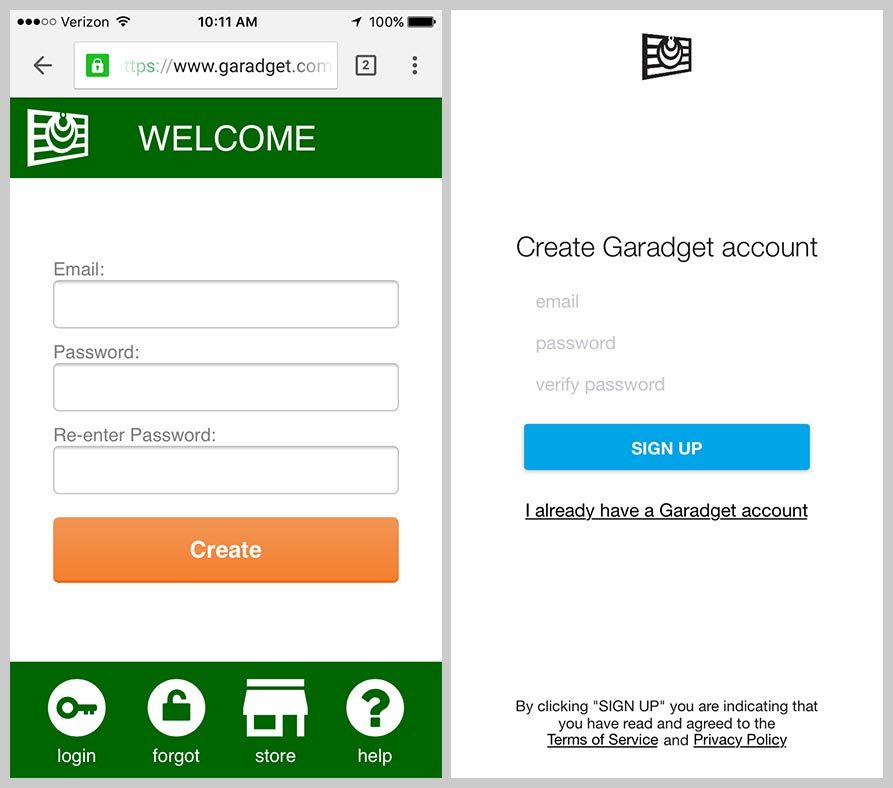
Initially you will be greeted with the account registration form. In this step you create a new account credentials for accessing your garage door opener. Make sure to create the password that is hard to guess yet you can remember.
After you have created an account, proceed to adding your first Garadget to it. For this step please make sure that:
- Garadget is located right next to your mobile device and within the strong coverage of your home network
- Garadget is powered on and in listening mode (LED slow blinking dark blue)
- your mobile device remains Internet connected

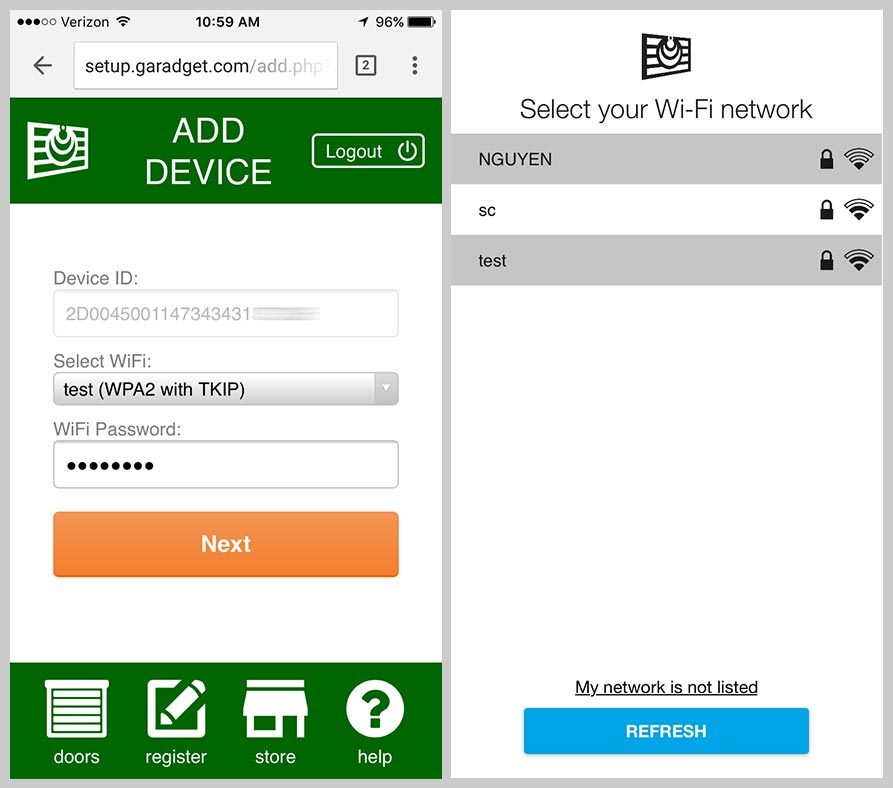
When instructed, switch to WiFi configuration screen of your mobile device and reconnect it to the temporary open hot spot created by Garadget. The name of the network will be PHOTON-XXXX where XXXX are random numbers and letters.
After connection is established, return to the app or the web-page. Following a short delay, you will be presented with the list of the WiFi networks visible to your Garadget. Select your home network and enter the connection credentials.
When connection is configured, the Garadget will first join your home network (LED blinking green) then login to the server (LED blinking cyan and later slowly pulsing cyan). In native mobile apps you will have a chance to name your device at this stage, in the Web app this can be done later in settings.
After successful setup procedure, your mobile device should reconnect to the Internet and the app should list your new device. If the new device is not listed in the account, try logging out and logging back in. Click on “R” button to reset the Garadget and make sure it successfully re-connects.
Please refer to troubleshooting guide if things are not going according to plan.
Controller Installation
Requirements
For successful controller installation you will need:
- configured Garadget controller with included screwdriver and supplies
- motorized garage door opener controlled with a wired wall button
- spare power outlet near the installation location
- ladder, additional light, additional tools depending on the type of the door opener
Safety
We would prefer that your Garadget setup experience did not include an ER visit. Your safety is your own responsibility. Before proceeding, please make sure that among other common sense safety measures you:
- are in right physical and mental condition for the task
- power down your garage door opener at all times while working around it
- have proper ladder with stable footing
- have sufficient light in work area
- do not look directly into the laser
- have somebody else around in case you need help
Please solicit the help of the licensed and insured professional if, for any reason, you are uncomfortable with performing the Garadget installation yourself.
Since you will be operating your garage remotely, it is critical that your garage door opener has functioning safety features such as motion reversal when encountering obstacle, photo eye (edge sensor) etc.
Wiring Research
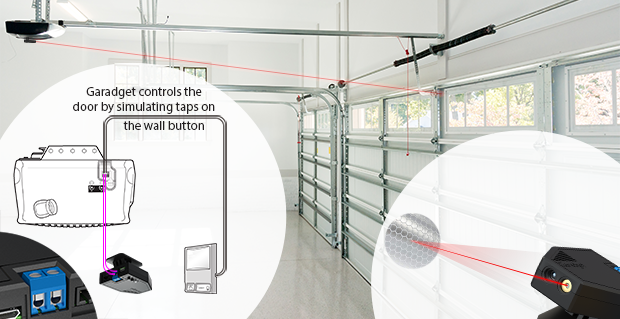
Majority of modern openers have the wires from the wall button coming into the terminals on the back of the unit. Garadget has electrically isolated relay with the contacts that should be connected to the same wires so it can simulate the push of the button. Before proceeding to the installation, it is very important to determine the wires from the wall button. The mistakes in this step may result in damaged opener and/or Garadget.
In some cases, the wiring can be traced to the button visually, but it is always a good idea to confirm the purpose of the connection on the back of your opener from the installation manual. If you don’t have one around, search the web by the model name. Additional information is available in Wiring Openers of section of community board.
Some of the systems (notably security+ 2.0 openers) use encoded protocol for wall buttons. If there are no terminals for wired garage control button, then Garadget can be wired to the contacts of the button inside of the spare wireless remote.
Some systems, frequently found in industrial settings, are installed with the separate wall buttons for opening and closing. Check the installation manual for one button wiring instructions.
Mechanical Installation
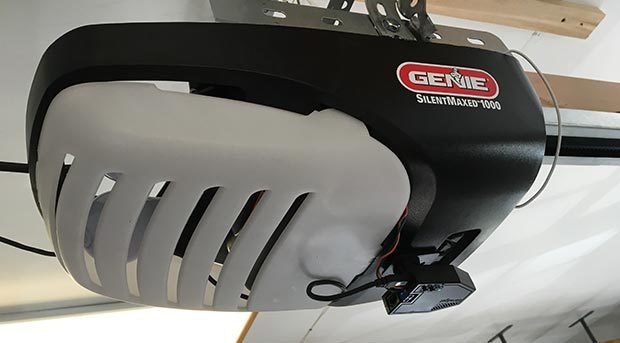
Typically Garadget is attached to the bottom of the garage opener unit using included double-sided adhesive pad.
Before permanently affixing the Garadget please make sure that the chosen location:
- has an unobstructed view of the flat area of the top panel of the garage door
- has a spare power outlet near by
- is near opener terminals or wall button wiring
- has the robust WiFi signal
Power up the Garadget using included power adapter and micro-USB cable. Be careful to not apply any lateral force while inserting the connector. Confirm that the LED is slowly pulsing cyan and laser is pulsing every second. Without applying adhesive pad, place Garadget in the chosen location to confirm that all above listed requirements are met.
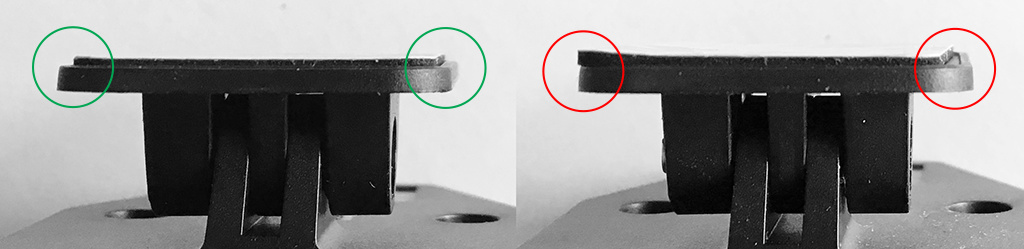
To mount the Garadget, first remove the double-sided adhesive pad from the protective sheet and apply it to the base taking time to ensure the correct alignment. The pad must sit flat within the recessed area of the mount and not cover raised edges.
Ensure that the selected mounting surface is clean and dry before removing the second protective sheet and permanently attaching the Garadget to the opener.
Once the adhesive grips, it’s NOT going to be easy to undo. Do not pull on the Garadget to remove it; instead try to pry along the base with the flat tool as you are leaning it to the other side. The kit includes the additional pad for the second chance.
There’s a mounting hole in the base for attaching garadget where use of adhesive pad is not practical. Separate the base of the mount from the body of the device before mounting using this method.
Wiring
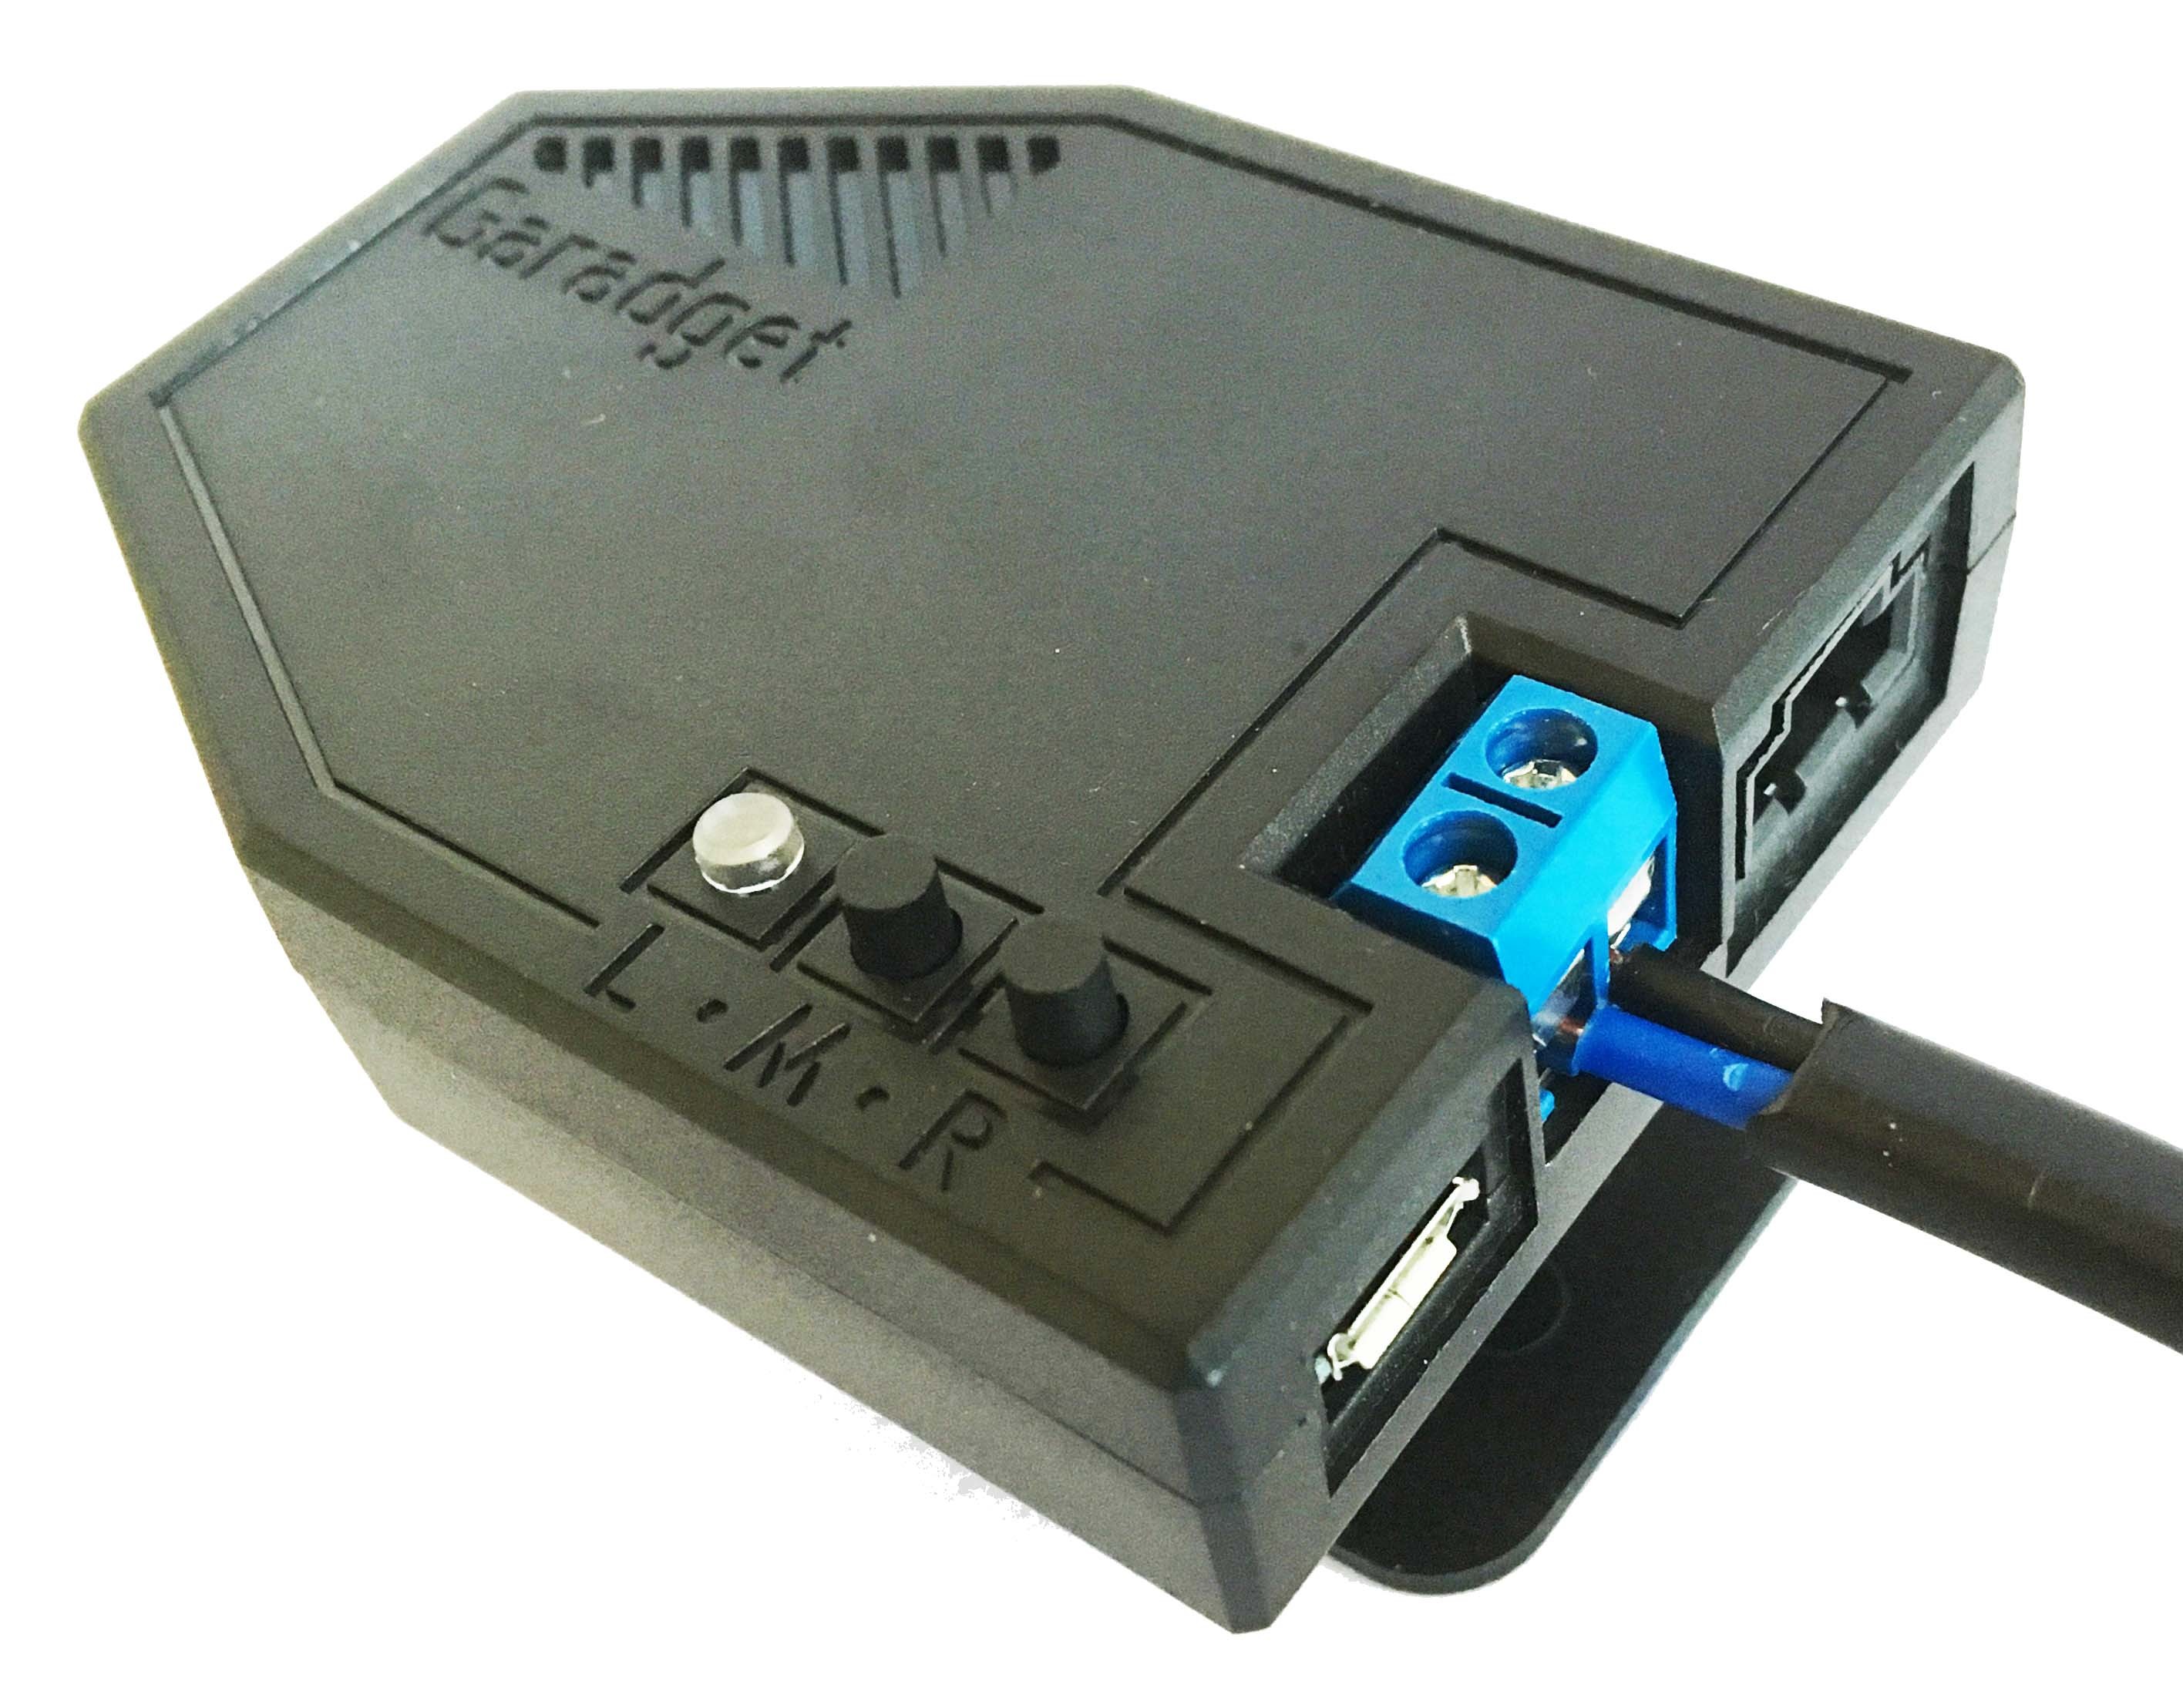
Use the included screwdriver to loosen both screws in the black terminal on the back of the Garadget without completely removing them. Push the stripped ends of the included controller wire under the tabs of the terminals then tighten the both screws. The polarity of this connection is not important.
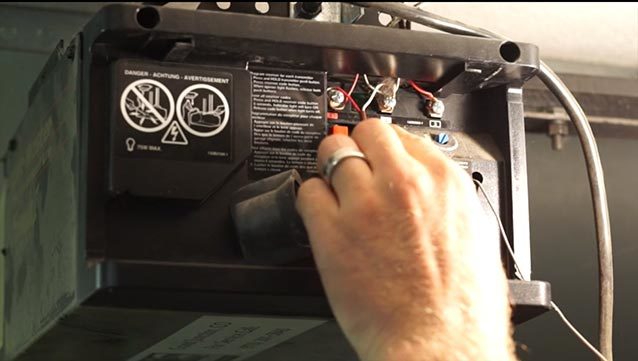
The other end of the control wire should be connected to the terminals of the garage door opener according to your research. If the length of the included wire is not sufficient, you can use 18/2 Solid Thermostat Wire from home improvement store.
Affixing reflective tag
Power up mounted Garadget and adjust its the vertical positioning so the laser is pointed at the flat area of the top panel of the garage door while it is closed. Tighten the mounting screw on the side. Using several strips of the scotch tape around the sides, temporarily attach the reflective tag to the door so the laser hits the center of the tag. At this point the software should be reporting the door state as “closed”. After about a day or two, permanently attach the reflector by removing the protective layer from the back and sticking it to the door panel.
If the laser beam travels off the reflector due to the vibration of the opener, affix additional sticker to increase the size of reflective area.
Fine tuning
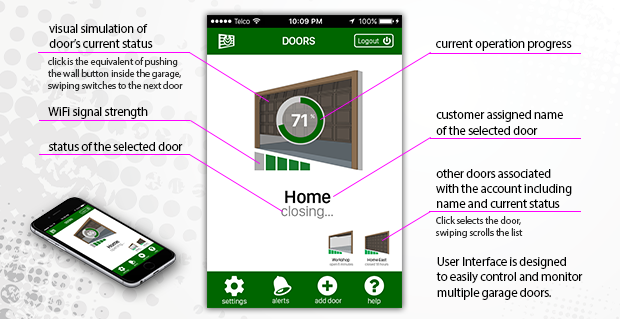
Garadget comes pre-set with the reasonable defaults, but you may want to visit Settings screen to rename your door and review other parameters, especially while troubleshooting. The detailed information about the available settings and alerts can be found here.
Technical Support
If your experienced any difficulties with the setup, please don’t get discouraged. Most likely you’re a simple adjustment away from the successful setup. To get your issue resolved please refer to the troubleshooting guide. If you still need help, please take a moment to search this community board for an existing solution, contribute to conversations or submit a new post. For extra brownie points, please post the details of what worked for you.
If you need to return, replace or repair your Garadget, please read this post first. Most of the time we will handle the process faster and with less hassle than the retailers. We will pay all the domestic shipping costs within 30 days satisfaction guarantee period and we’ll ship your repaired or replaced Garadget to the USA address at no cost within one year warranty period.
Your Reviews
If you’re enjoying your Garadget and want to it to become even more awesome - please review & share. Your support of the project is very much appreciated.
Happy Garadgeting! ![]()